Knowing iPhone tips and tricks is really important. It helps you use your phone better and saves time. These tips show you how to do things faster and easier on your iPhone. Like using shortcuts to get to apps quickly or changing settings to make your phone work better for you. They also teach you how to fix common problems and make your phone run smoothly. Understanding these tips makes using your iPhone easier and more enjoyable.
1. Multitasking Gestures: How to do it?
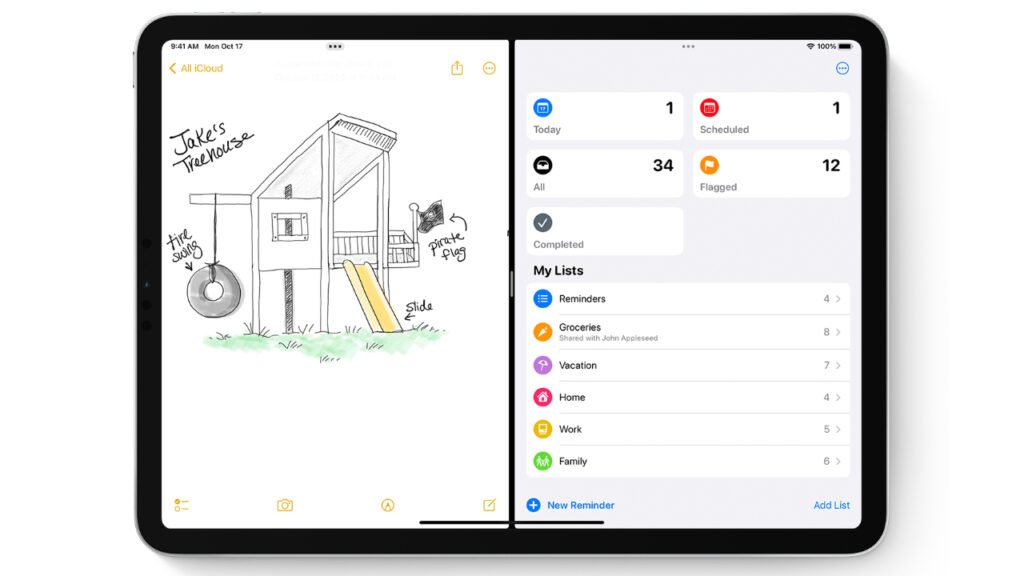
Multitasking on your iPad can be a breeze if you know how to leverage its multitasking gestures. These simple finger movements allow you to navigate between apps, access the app switcher, and effortlessly move and manipulate content on your screen. Let’s delve into these gestures and how they can streamline your iPad experience.
What are Multitasking Gestures?
Multitasking gestures are finger movements performed on the iPad’s touchscreen that enable various multitasking features. They are designed to enhance productivity by allowing users to quickly switch between apps, access the app switcher, and perform other actions without the need for physical buttons or complex maneuvers.
How to Use Multitasking Gestures
- Switch Between Apps: Swipe left or right with four or five fingers to switch between open apps. This allows you to seamlessly transition from one task to another without having to return to the home screen.
- Access the App Switcher: To view all open apps and switch between them, swipe up from the bottom of the screen with four or five fingers. This gesture brings up the app switcher, where you can see previews of your open apps and easily select the one you want to switch to.
- Return to the Home Screen: Pinch with four or five fingers to return to the home screen from any app or screen. This gesture is a quick way to exit an app and return to the familiar home screen layout.
- Activate Reachability: On models with Face ID, swipe down from the bottom edge of the screen to activate Reachability. This feature moves the top of the screen down within reach of your thumb, making it easier to interact with content on large devices with one hand.
- Zoom In and Out: While viewing an image or webpage, use a pinching motion with two fingers to zoom in and out. This gesture allows you to adjust the level of detail or zoom level to suit your preferences.
Why Use Multitasking Gestures?
Mastering multitasking gestures can significantly improve your efficiency and productivity on the iPad. By eliminating the need to rely solely on physical buttons or menu options, these gestures streamline common tasks and make navigating between apps and content more intuitive.
Multitasking gestures are a powerful tool for maximizing productivity and efficiency on your iPad. By learning and incorporating these simple finger movements into your daily workflow, you can seamlessly switch between apps, access the app switcher, and manipulate content with ease. Take the time to practice and familiarize yourself with these gestures, and unlock the full potential of your iPad.
2. Split Screen and Slide Over
Split Screen and Slide Over are two powerful multitasking features on the iPad that allow you to use multiple apps simultaneously, enhancing your productivity and efficiency. Whether you’re taking notes while researching online, chatting with colleagues while reviewing documents, or watching a video while browsing the web, Split Screen and Slide Over enable seamless multitasking without sacrificing usability. Let’s explore these features and how you can leverage them to make the most of your iPad.
Understanding Split Screen and Slide Over
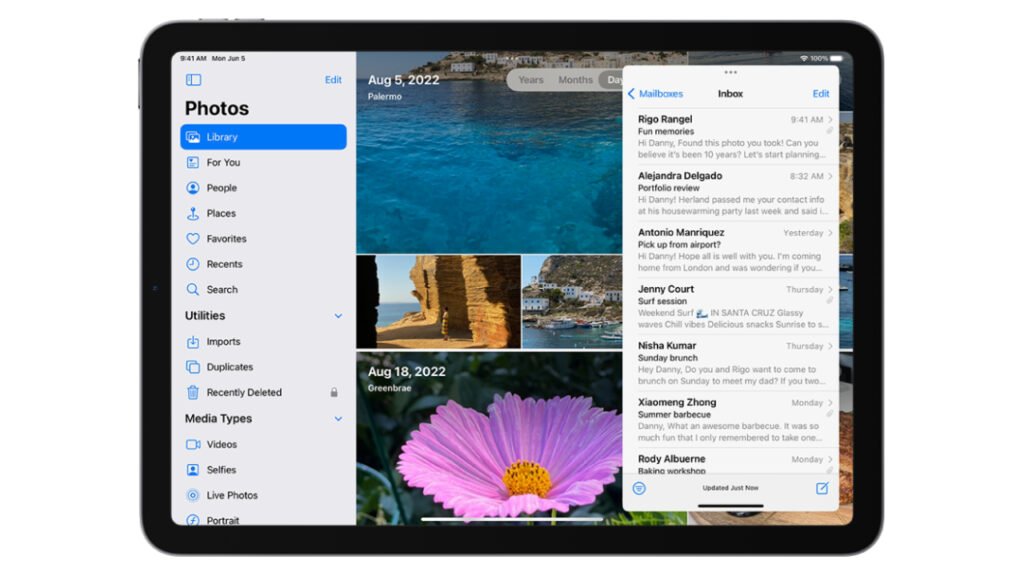
- Split Screen: Split Screen mode divides your iPad’s display into two separate app windows, allowing you to run and interact with two apps side by side. This feature is particularly useful for tasks that require referencing information from one app while working in another.
- Slide Over: Slide Over enables you to quickly access a second app without leaving the current one. When activated, the second app appears as a floating window that overlays the primary app, making it easy to glance at information or perform quick tasks without interrupting your workflow.
How to Use Split Screen and Slide Over
- Activate Split Screen: To activate Split Screen mode, open one app and then swipe up from the bottom of the screen to reveal the Dock. Drag the second app you want to use from the Dock to the left or right edge of the screen until it snaps into place.
- Adjust Split Screen Layout: You can adjust the size of each app window in Split Screen mode by dragging the divider between them left or right. This allows you to prioritize screen space based on your current task and preferences.
- Activate Slide Over: To activate Slide Over, swipe up from the bottom of the screen to reveal the Dock, then drag the app you want to use for Slide Over onto the screen. The app will appear as a floating window that you can move around and interact with while the primary app remains visible in the background.
- Switch Between Apps: While in Split Screen or Slide Over mode, you can easily switch between apps by swiping left or right on the dividing line between them. This allows for seamless navigation and multitasking without returning to the home screen.
Benefits of Split Screen and Slide Over
- Increased Productivity: Split Screen and Slide Over enable you to perform multiple tasks simultaneously, reducing the need to switch back and forth between apps and saving time.
- Enhanced Focus: With Split Screen, you can keep relevant information visible while working in another app, eliminating the need to constantly switch contexts and improving focus.
- Effortless Multitasking: Slide Over provides quick access to additional apps without disrupting your current workflow, allowing you to seamlessly integrate supplementary tasks into your work.
Split Screen and Slide Over are invaluable tools for maximizing productivity and efficiency on your iPad. By mastering these multitasking features, you can harness the full potential of your device and effortlessly juggle multiple tasks with ease. Incorporate Split Screen and Slide Over into your workflow to streamline your productivity and make the most of your iPad experience.
3. Quick App Switching: Making Switching Between Apps Easy
Quick app switching is when you quickly move from one app to another app on your iPad. Instead of going back to the home screen every time you want to open a different app, you can switch directly between the apps you’re using. It’s like changing TV channels without going back to the main menu.
How to Do Quick App Switching:
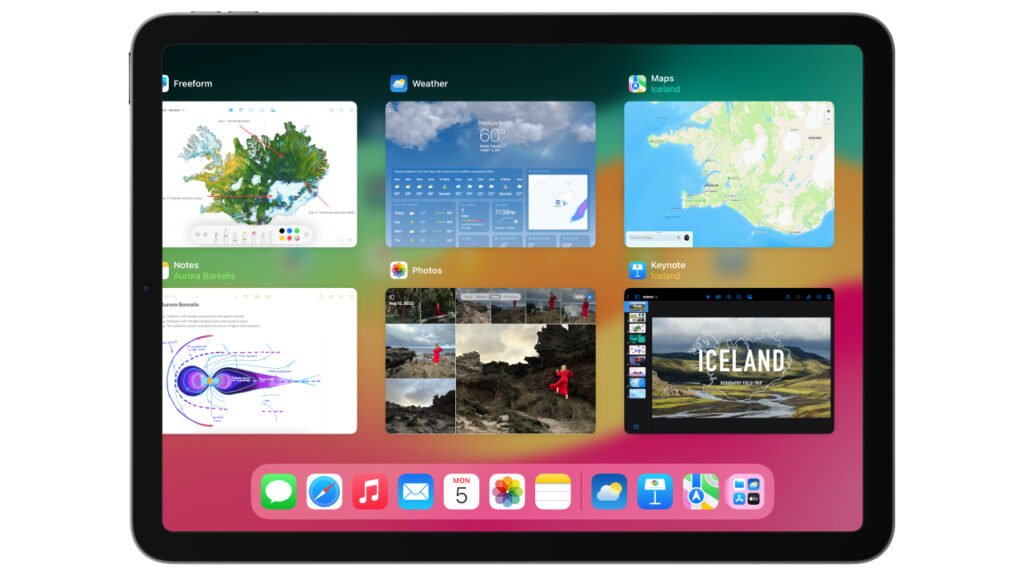
- Swipe Up: Swipe up from the bottom of the screen and pause in the middle. This will show you all the apps you have open.
- Swipe Left or Right: Swipe left or right with your finger to scroll through the open apps. Each app you swipe to will appear on the screen.
- Select App: When you find the app you want to switch to, tap on its window. This will make that app come to the front, and you can start using it right away.
Why Use Quick App Switching?
- Faster Access: Instead of going back to the home screen and finding the app icon every time you want to switch apps, quick app switching lets you jump directly between apps, saving time.
- Seamless Workflow: If you’re working on multiple tasks or projects, quick app switching allows you to move between different apps smoothly without interrupting your workflow.
- Stay Organized: With quick app switching, you can easily keep track of which apps you have open and switch between them effortlessly, helping you stay organized and focused on your tasks.
Quick app switching is a handy feature on the iPad that allows you to switch between apps swiftly and seamlessly. By swiping up from the bottom of the screen and selecting the app you want, you can streamline your workflow and improve your productivity. Incorporate quick app switching into your iPad usage to make multitasking a breeze and enhance your overall user experience.
4. Drag and Drop Functionality: Moving Things Around on Your iPad Easily
Drag and drop is a simple way to move things—like text, images, or files—from one place to another on your iPad. It’s like picking up an object with your hand and placing it somewhere else. With drag and drop, you can quickly rearrange content, copy items, or share information between apps without any hassle.
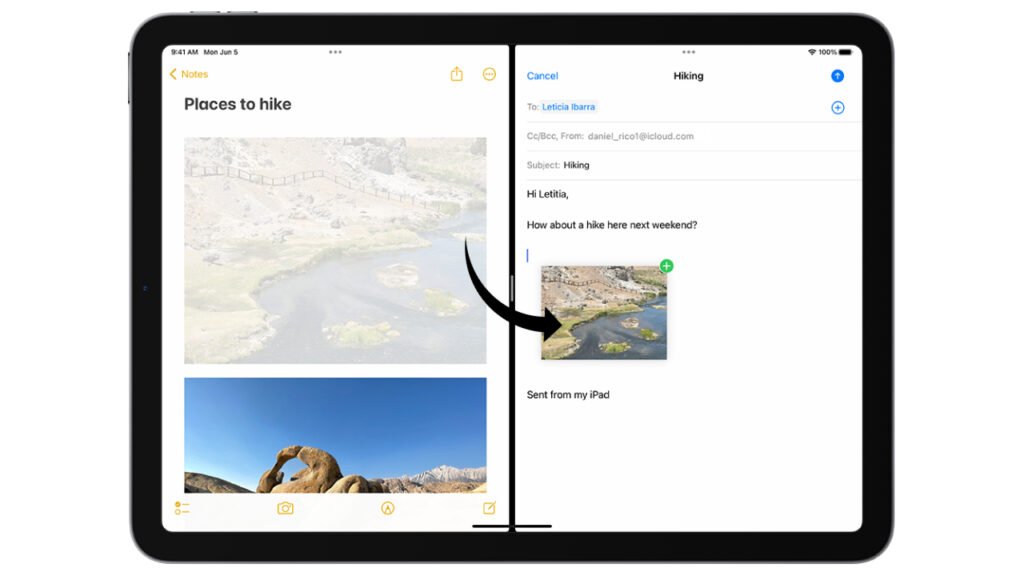
How Drag and Drop Works:
- Select and Hold: Start by touching and holding the item you want to move. This could be a photo, a piece of text, or a file.
- Move Your Finger: While still holding the item, move your finger across the screen. You’ll see the item follow your finger as you move it.
- Drop it: When you’ve reached the place where you want to put the item, simply lift your finger off the screen. The item will be dropped into its new location.
Why Use Drag and Drop?
- Efficiency: Drag and drop makes it quicker and easier to move things around on your iPad compared to other methods like copy and paste. You can do it all in one smooth motion.
- Multitasking: It’s perfect for multitasking because you can quickly transfer information between different apps. For example, you can drag a photo from your photo library into an email you’re composing.
- Organization: Whether you’re rearranging files in a folder or organizing your notes, drag and drop helps you keep everything neat and tidy on your iPad.
Drag and drop functionality is a handy tool that simplifies moving and organizing content on your iPad. By selecting, holding, and moving items with your finger, you can effortlessly rearrange text, images, and files to suit your needs. Incorporate drag and drop into your iPad workflow to streamline tasks, enhance productivity, and make managing your digital content a breeze.
5. iPad Keyboard Shortcuts: Quick Ways to Do Things with Your Keyboard
iPad keyboard shortcuts are like secret codes that help you do things faster using your keyboard instead of touching the screen. Just like pressing keys on a computer keyboard to copy text or open a new window, iPad keyboard shortcuts let you do similar tasks without moving your fingers away from the keys.
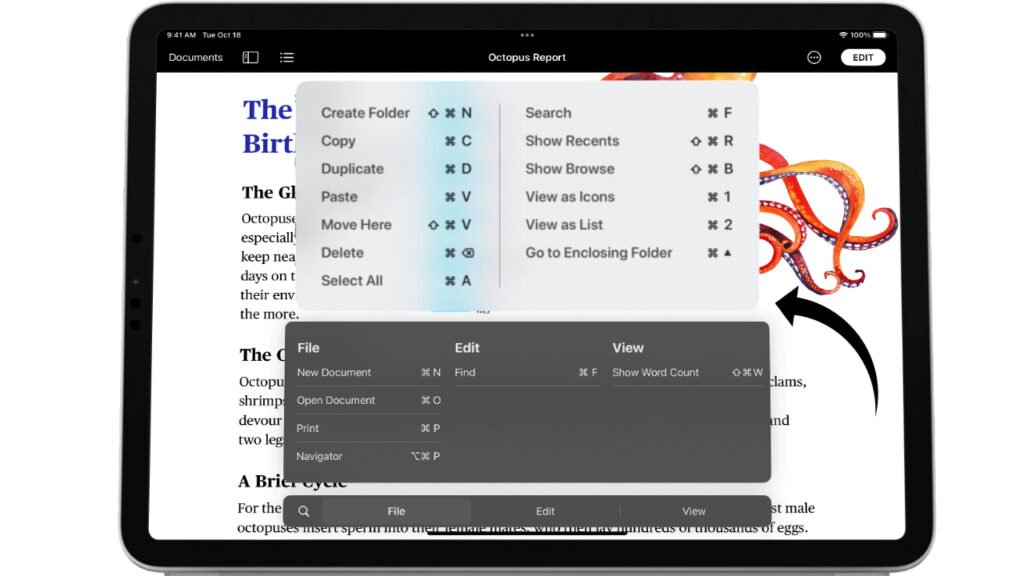
How Keyboard Shortcuts Work:
- Key Combinations: Keyboard shortcuts are usually a combination of two or more keys pressed together. For example, pressing “Command” and “C” together copies selected text.
- Common Shortcuts: Some common keyboard shortcuts on the iPad include:
- Command + C: Copy
- Command + V: Paste
- Command + Z: Undo
- Command + A: Select All
- Command + B: Bold
- Command + I: Italic
- Command + F: Find
3. App-Specific Shortcuts: Different apps may have their own special shortcuts for specific actions. You can usually find these in the app’s settings or by searching online.
Why Use Keyboard Shortcuts?
- Speed: Keyboard shortcuts are much faster than tapping on the screen, especially for tasks you do often like copying and pasting text or formatting.
- Efficiency: They help you work more efficiently by keeping your hands on the keyboard, so you don’t have to switch between the keyboard and the touchscreen as often.
- Accessibility: For some people, using a physical keyboard may be easier or more comfortable than using a touchscreen, so keyboard shortcuts make using the iPad more accessible.
iPad keyboard shortcuts are a handy way to speed up your workflow and make using your iPad more efficient. By memorizing common shortcuts and learning app-specific ones, you can perform tasks with just a few key presses, saving time and effort. Whether you’re writing, editing, or navigating through apps, incorporating keyboard shortcuts into your iPad usage can greatly enhance your productivity and overall user experience.
